How a customer claims (assigns) their tickets
Updated Thu Aug 20 2026 00:00:00 GMT+0000 (Coordinated Universal Time)
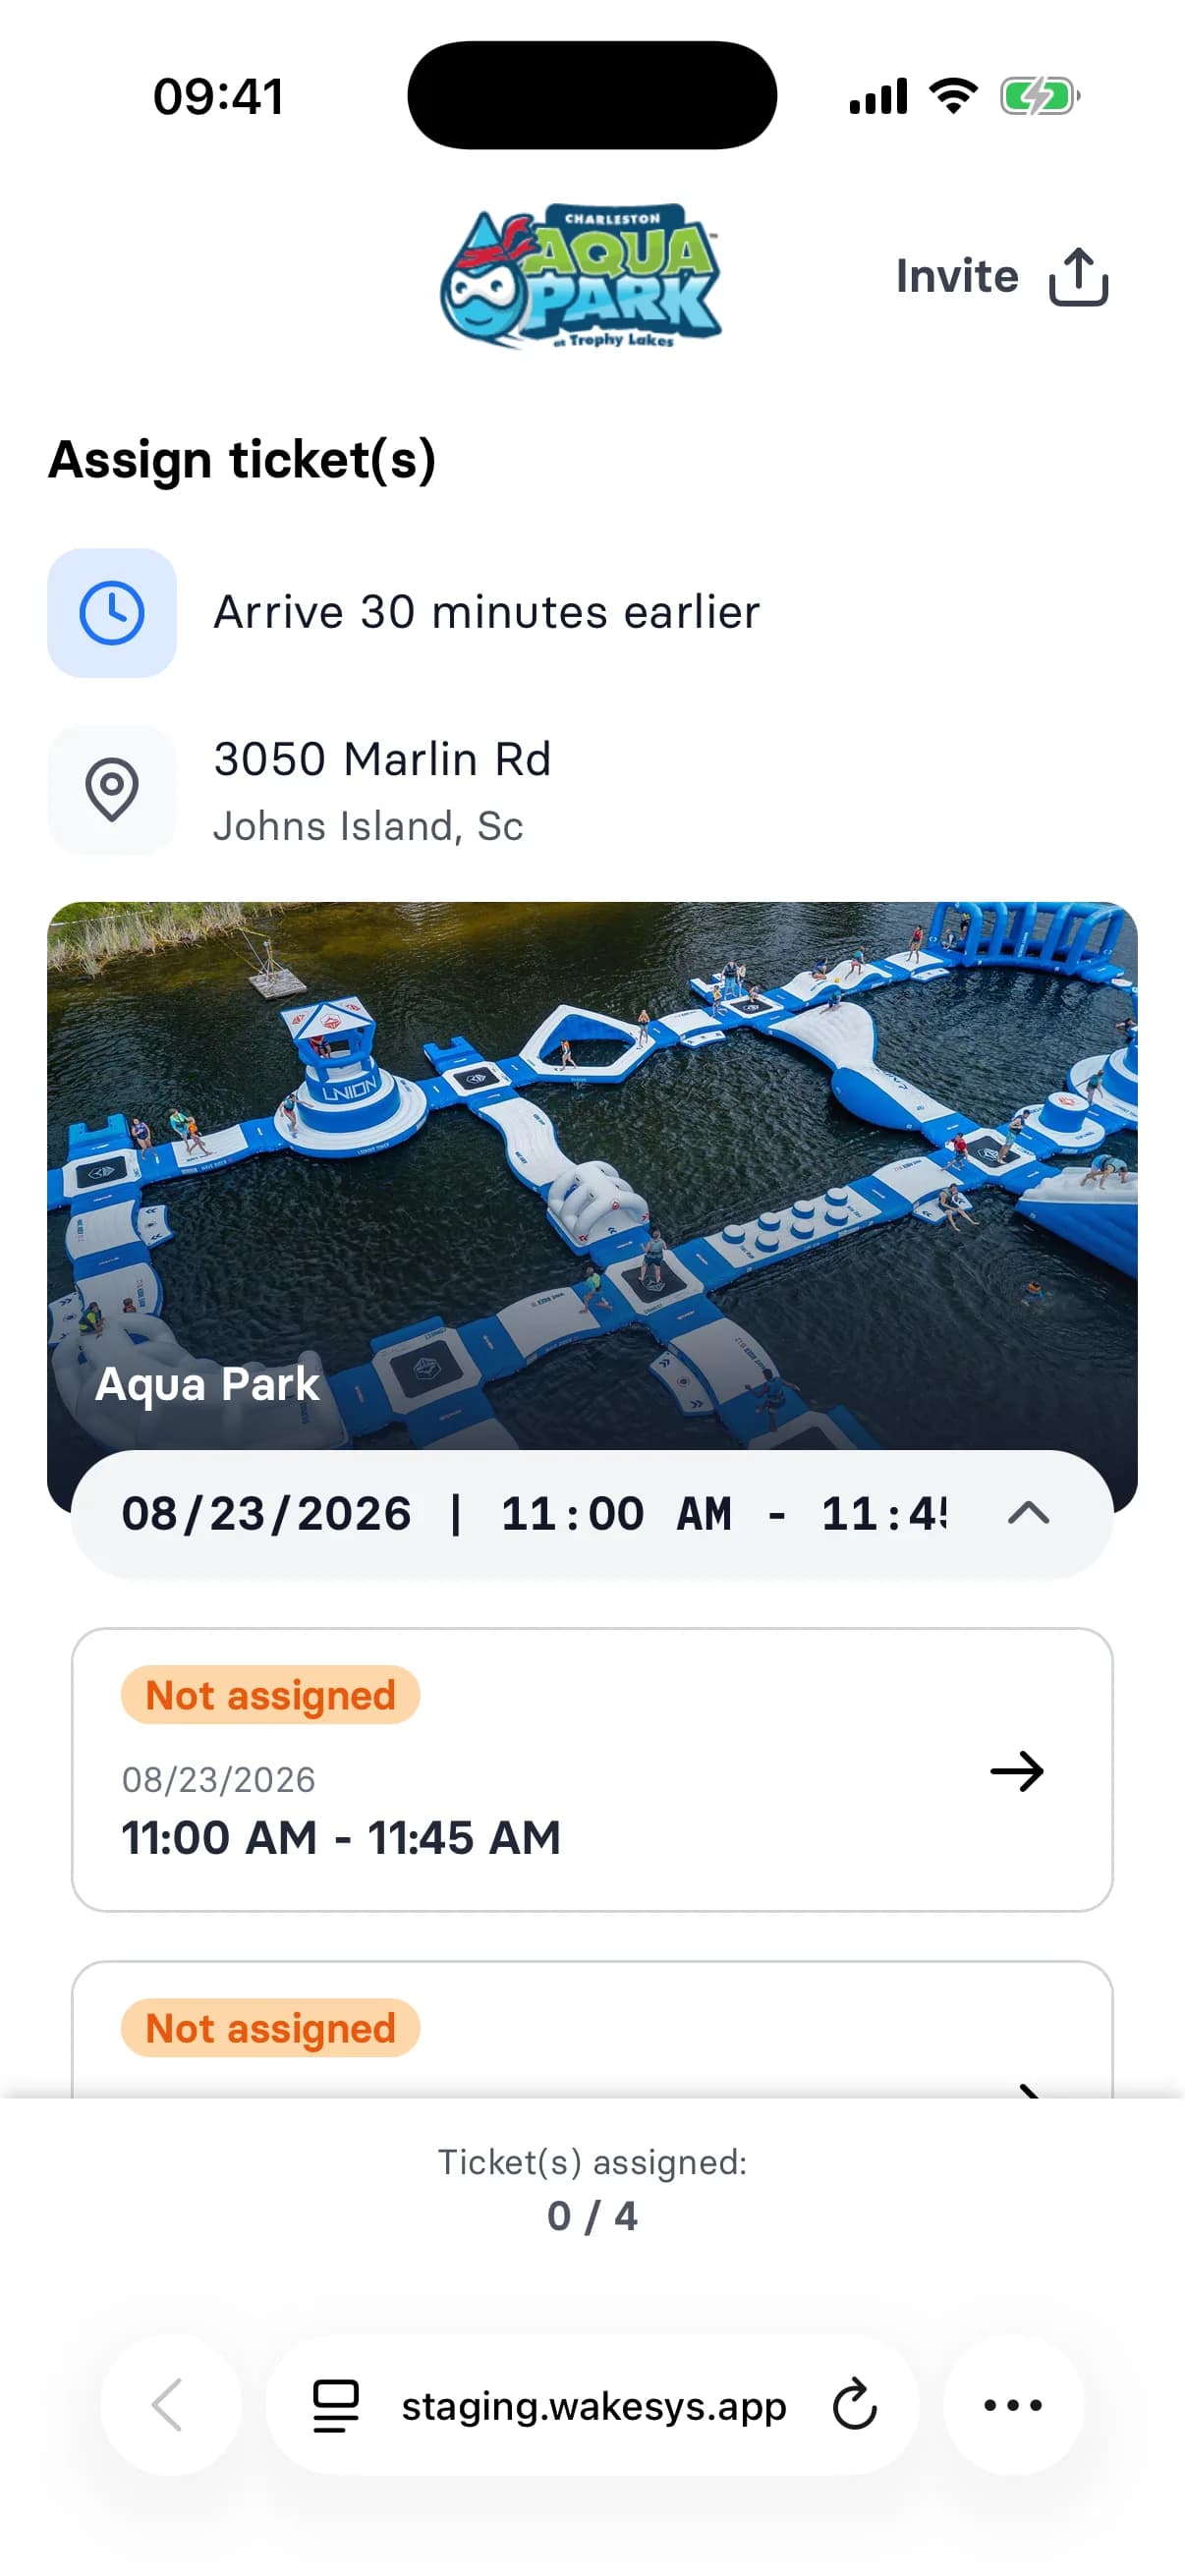
After paying, the booking owner links each ticket to the person who'll use it. The product calls this Assign ticket(s).
Assign your tickets
- From the confirmation page or the email link, open Assign ticket(s).
- Tap a ticket and choose who it's for — Myself, a spouse/partner, or a child.
- Each adult enters their own details and signs the waiver; the owner can also unassign a ticket (unless it's already checked in).
The page also shows how early to arrive, if the offer sets an arrive-early time.
Invite friends and family to assign their own
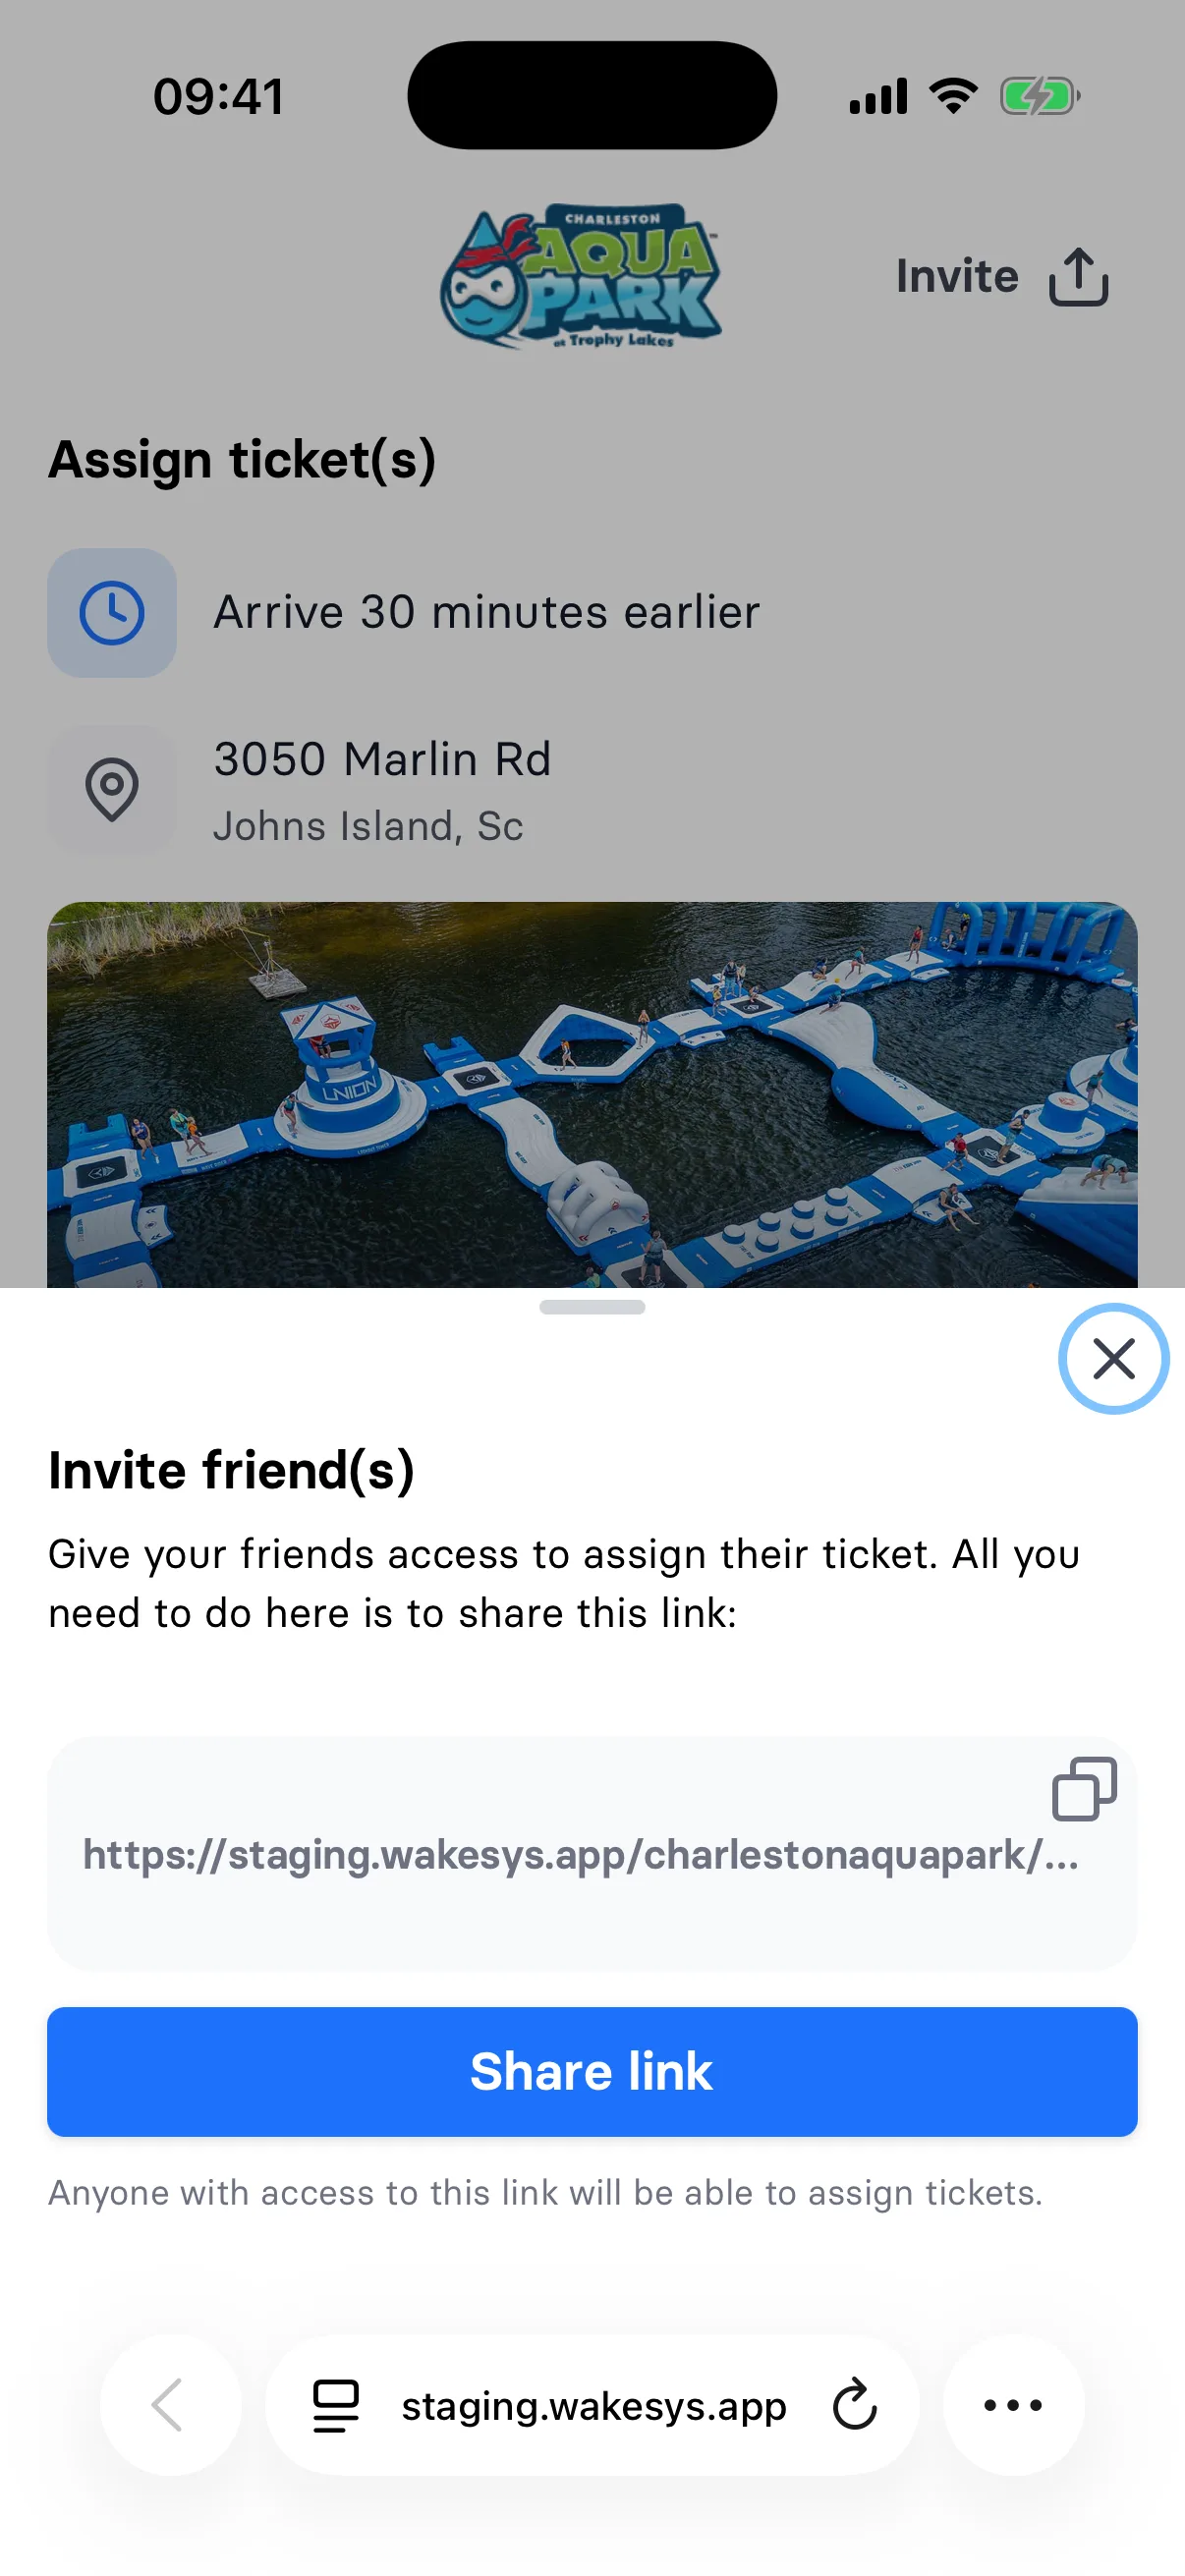
Tap Invite and share the link. Anyone with the link can assign the unclaimed tickets and sign their own waiver — handy for groups, so each adult fills in their own details.
On a phone or tablet you'll see Share link, which opens the normal iOS or Android share sheet, so the link can go straight into WhatsApp or Messages. On a computer the button reads Copy link instead.
Children
A child must be linked to a guardian, and the guardian signs the child's waiver — see How to register a child.
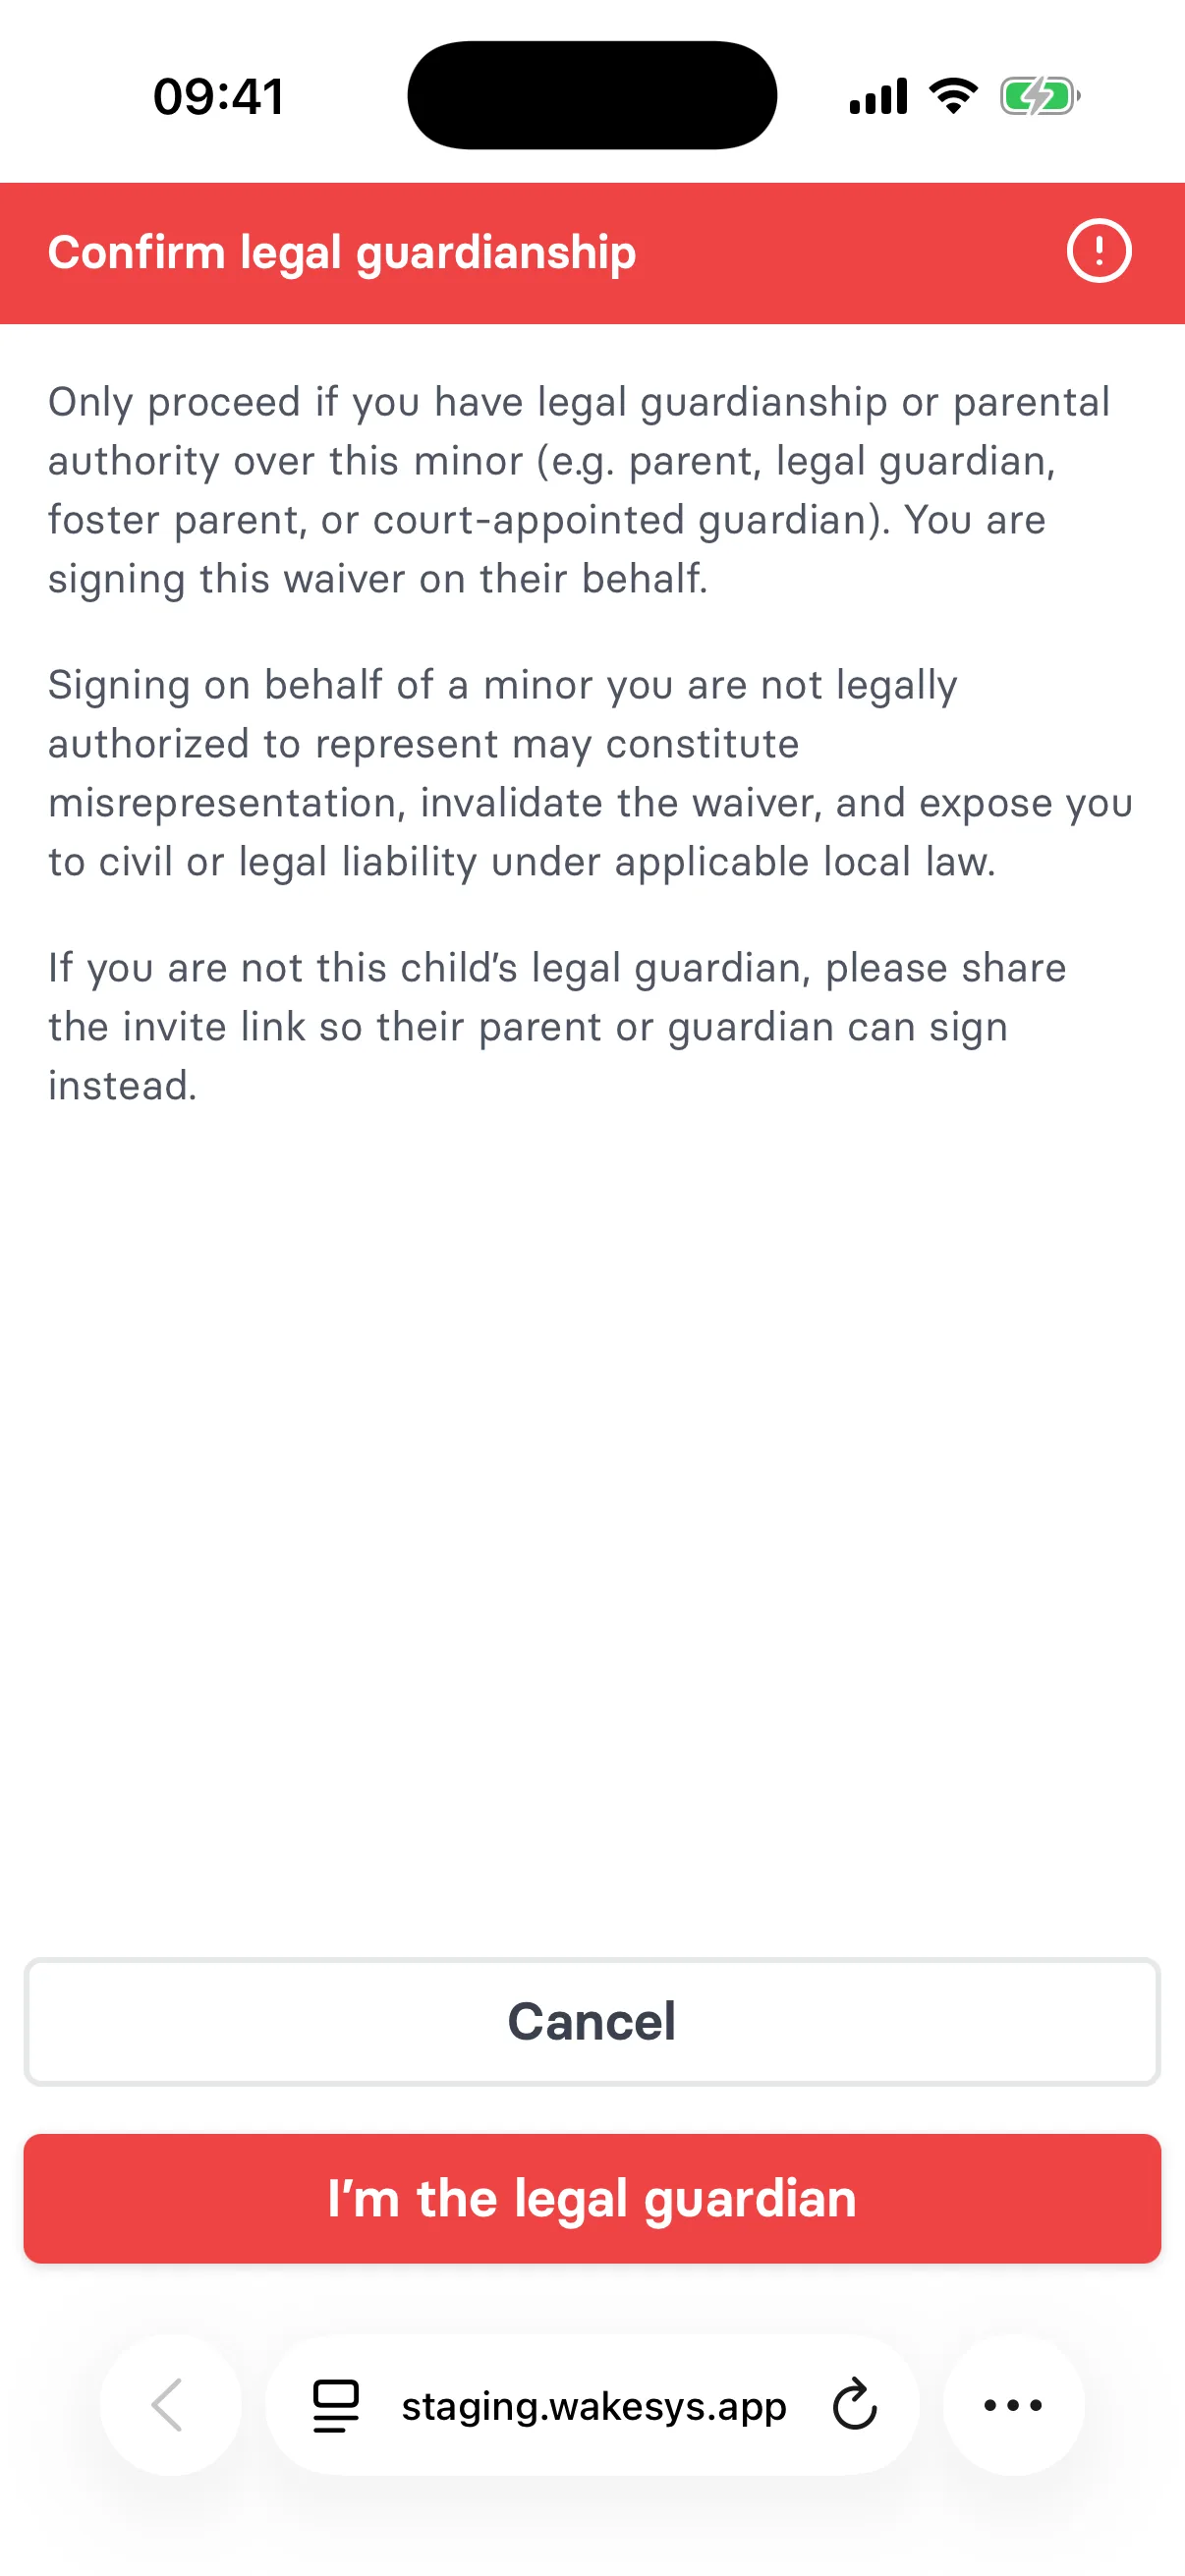
If someone picks Not my child — assigning a ticket to a child who isn't theirs — a Confirm legal guardianship step appears first, warning that only a parent or legal guardian should continue. Cancelling goes back to the invite link, so the child's actual guardian can be sent the link and do it themselves.